Stap 2: config.ini configureren
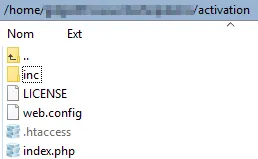
- Ga naar de submap “inc” en bewerk het bestand config.ini dat op uw server is opgeslagen.
Controleer nogmaals dat het bestand config.ini niet publiek toegankelijk is (de .htaccess voorkomt dat eindgebruikers er toegang toe krijgen), omdat dit bestand gevoelige gegevens bevat voor het genereren van activeringssleutels.
Het belangrijke deel van het bestand config.ini ziet er als volgt uit:
[globals]
; ====== Modify the following parameters for your workbook ======; ** Your XLS Padlock user ID **xlspadlockuserid = "xps-1000000000"
; ** Default maximum number of activations per order allowed (we also take account of order quantity).; For instance, if the customer bought a quantity of 2 products and with defmaxactivperorder = 2, we would allow 4 activations.defmaxactivperorder = 2
; Determines whether the server should enforce license expiration.; When set to true, the server will manage expiration of activations based on the parameters defined in workbooks.json:;   - keymaxruns: Maximum number of executions allowed.;   - keymaxdays: Maximum number of days the activation is valid.;   - keyexpiredate: Specific expiration date for the activation.; Only one of these expiration modes should be set per product variation.; If set to false, the compiled workbook application will handle expiration embedded into the activation key without server-side checks (less secure).; Possible values: true or false.use_server_expiration = true
; ** Relative path to the wp-load.php file of your WordPress installation. If you installed the kit in a subfolder of your WordPress root folder,; there is no need to modify this link.wprelativefolder = "/../"
; ID of the target site in a multisite setup (replace with the desired site ID); You must see your admin page to find it.; If this is not a multisite, leave the value at -1.target_site_id = -1
; ====== Logging Configuration ======; **  Enable or disable logging **enable_logging = true
; ** Logging level: DEBUG, INFO, WARNING, ERROR, CRITICAL **log_level = "ERROR"
; ** Path to the log file **log_path = "logs/app.log"-
Wijzig de waarde van het item met de naam xlspadlockuserid in uw XLS Padlock gebruikers-ID. Deze gebruikers-ID vindt u in de registratie-e-mail die u hebt ontvangen toen u XLS Padlock kocht. Belangrijk: vergeet niet dat de gebruikers-ID begint met xps-
-
Als u de map “xlspadlock-woocom” in een ingewikkeldere mappenstructuur dan een submap hebt geplaatst, moet u het pad van deze map opgeven ten opzichte van de hoofdmap van uw WordPress-map (de hoofdmap bevat wp-load.php).
-
Optioneel: als u een WordPress-multisite-installatie hebt, vervang dan de waarde van target_site_id door de werkelijke ID van de site die u wilt aanspreken. Laat anders -1 staan voor een enkele WordPress-site.
-
Als u het logboek wilt gebruiken om uitgevoerde bewerkingen op te slaan, kunt u foutrapportage inschakelen door `error_logging` op `true` te zetten en vervolgens een logboekniveau te kiezen, zoals `INFO`.
- Sla de wijzigingen aan het bestand config.ini op.
De webtoepassing is nu klaar om gegevens te ontvangen van de gecompileerde werkmap-EXE-bestanden en te communiceren met uw WordPress/WooCommerce-website.