Paso 2: configurar config.ini
- Vaya a la subcarpeta “inc” y edite el archivo config.ini almacenado en su servidor.
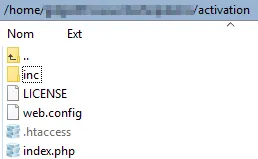
Una vez más, compruebe que no se puede acceder públicamente al archivo config.ini (el archivo .htaccess impide que los usuarios finales accedan a él), ya que este archivo contiene datos confidenciales para generar claves de activación.
La parte importante del archivo config.ini tiene este aspecto:
[globals]
; ====== Modify the following parameters for your workbook ======; ** Your XLS Padlock user ID **xlspadlockuserid = "xps-1000000000"
; ** Default maximum number of activations per order allowed (we also take account of order quantity).; For instance, if the customer bought a quantity of 2 products and with defmaxactivperorder = 2, we would allow 4 activations.defmaxactivperorder = 2
; Determines whether the server should enforce license expiration.; When set to true, the server will manage expiration of activations based on the parameters defined in workbooks.json:;   - keymaxruns: Maximum number of executions allowed.;   - keymaxdays: Maximum number of days the activation is valid.;   - keyexpiredate: Specific expiration date for the activation.; Only one of these expiration modes should be set per product variation.; If set to false, the compiled workbook application will handle expiration embedded into the activation key without server-side checks (less secure).; Possible values: true or false.use_server_expiration = true
; ** Relative path to the wp-load.php file of your WordPress installation. If you installed the kit in a subfolder of your WordPress root folder,; there is no need to modify this link.wprelativefolder = "/../"
; ID of the target site in a multisite setup (replace with the desired site ID); You must see your admin page to find it.; If this is not a multisite, leave the value at -1.target_site_id = -1
; ====== Logging Configuration ======; **  Enable or disable logging **enable_logging = true
; ** Logging level: DEBUG, INFO, WARNING, ERROR, CRITICAL **log_level = "ERROR"
; ** Path to the log file **log_path = "logs/app.log"-
Cambie el valor de la entrada denominada xlspadlockuserid por su ID de usuario de XLS Padlock. Este ID de usuario está disponible en el correo electrónico de registro que recibió al comprar XLS Padlock. Importante: recuerde que el ID de usuario comienza por xps-
-
Si ha colocado la carpeta “xlspadlock-woocom” en un árbol de directorios más complejo que un subdirectorio, deberá especificar la ruta de este directorio en relación con la raíz de su directorio de WordPress (la carpeta raíz contiene wp-load.php).
-
Opcional: si dispone de una instalación multisitio de WordPress, reemplace el valor de target_site_id por el ID real del sitio que desea utilizar como destino. De lo contrario, deje -1 para un único sitio de WordPress.
-
Si desea utilizar el registro para almacenar las operaciones realizadas, puede habilitar el informe de errores estableciendo `error_logging` en `true` y eligiendo después un nivel de registro, como `INFO`.
- Guarde las modificaciones del archivo config.ini.
La aplicación web ya está lista para recibir datos de los archivos EXE de libro compilados y comunicarse con su sitio web de WordPress/WooCommerce.