Crear un formulario de registro
XLS Padlock le permite personalizar el texto que aparece en el cuadro de diálogo de activación. El texto admite la presentación básica en HTML, por lo que puede usar etiquetas HTML como <B></B>, etc. También se pueden crear campos: este es el tema de esta sección.
Crear los campos del formulario de registro
Section titled “Crear los campos del formulario de registro”Para crear un formulario de registro y definir los distintos campos, abra su proyecto en XLS Padlock y vaya a la página “Activation Keys / Online Activation”. Para una descripción completa de los tipos de campo y las opciones disponibles, consulte el Editor del formulario de registro.
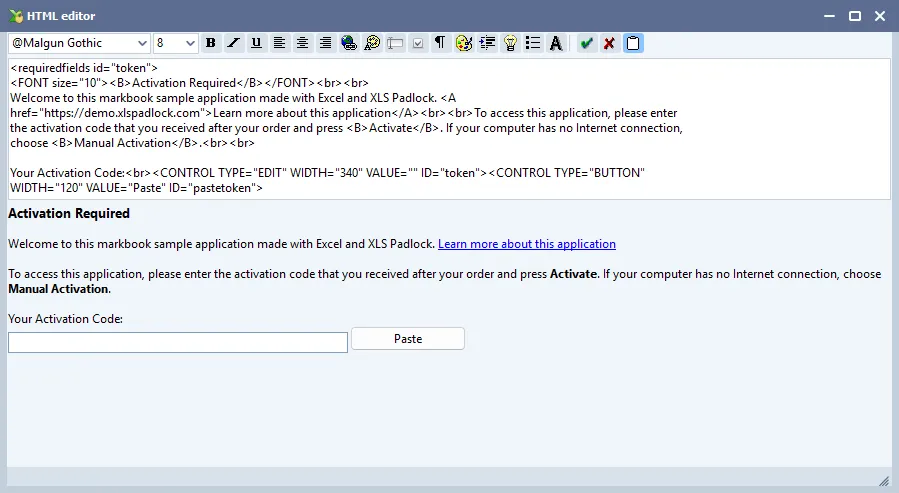
XLS Padlock muestra un editor HTML básico y una vista previa del texto del cuadro de diálogo.
Dos botones específicos le permiten añadir campos personalizados si desea solicitar más información a los usuarios finales y hacer que su aplicación envíe esta última a su servidor web.
Por ejemplo, para crear un campo de texto, escriba:
Your Name:<br><CONTROL TYPE="EDIT" WIDTH="280" VALUE="" ID="name"><br>La etiqueta CONTROL define un campo de tipo EDIT (texto). Puede definir el WIDTH en píxeles y, especialmente, su ID. Este ID debe ser único y es el nombre del campo que se devolverá a la aplicación web durante la activación.
Cómo recibe la aplicación web los datos del formulario
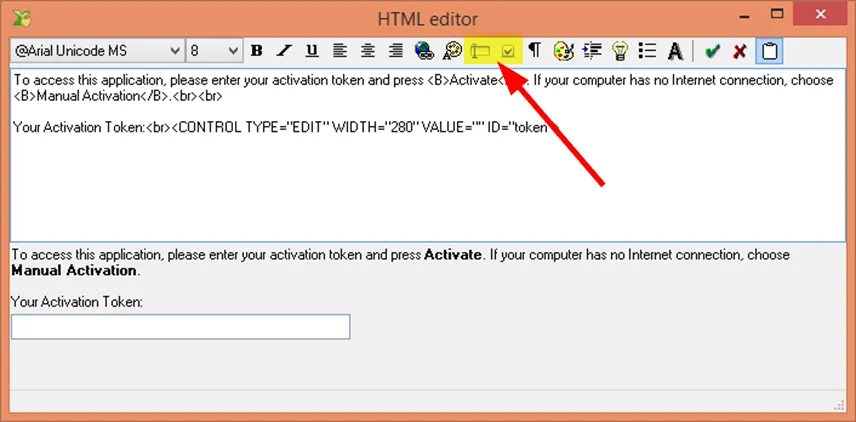
Section titled “Cómo recibe la aplicación web los datos del formulario”Suponga que ha creado tres campos: name, email y token:
Your Name:<br><CONTROL TYPE="EDIT" WIDTH="280" VALUE="" ID="name"><br>Your Email Address:<br><CONTROL TYPE="EDIT" WIDTH="280" VALUE="" ID="email"><br>Your Activation Token:<br><CONTROL TYPE="EDIT" WIDTH="280" VALUE="" ID="token"><br>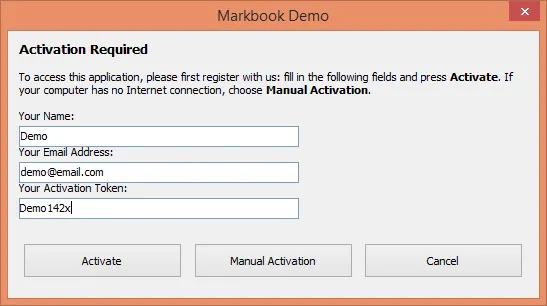
Cuando el usuario final hace clic en Activate, el archivo EXE del libro devuelve los datos del formulario a su aplicación web. Realiza una solicitud HTTP POST y la aplicación web procesará los datos.
La solicitud HTTP POST es procesada por el Main Controller de la aplicación web, definido en el archivo MainController.php, ubicado en la subcarpeta inc/app/controllers (xlspadlock-onlineact / inc / app / controllers).
Cerca de la línea 15, puede ver varias líneas de código:
$action = $f3->get('REQUEST.action');$systid = $f3->get('REQUEST.systid');$apptitle = $f3->get('REQUEST.apptitle');$cod = $f3->get('REQUEST.cod');Por ejemplo, el título de la aplicación de su libro compilado se almacena en la variable PHP local $apptitle.
Si volvemos a los tres campos definidos anteriormente, puede recuperar fácilmente sus valores gracias a estas líneas adicionales que se muestran a continuación y que tendría que colocar en MainController.php, justo después del código anterior:
$username = $f3->get('REQUEST.name');$email = $f3->get('REQUEST.email');$token = $f3->get('REQUEST.token');Como puede ver, cada campo definido en el formulario de registro por su ID único puede recuperarse en el código PHP mediante el código genérico:
$idvalue = $f3->get('REQUEST.ID');Validar y almacenar los datos del formulario
Section titled “Validar y almacenar los datos del formulario”El framework F3 que utiliza el kit de activación incluye todas las herramientas necesarias para procesar y almacenar los datos del formulario.
Por ejemplo, podría determinar si un usuario tiene derecho a activar su libro en función del valor del token. O almacenar los datos del usuario en una base de datos (consulte https://fatfreeframework.com/3.9/databases).