Video Tutorial Available
Check out these video tutorials about XLS Padlock from an Excel expert: https://excelvbaisfun.com/?ref=5
1. Open and Save Your Workbook #
Begin by opening the workbook you wish to protect in Excel. Ensure all changes are saved before proceeding.
2. Configure Protection Options #
To begin, open the XLS Padlock interface from the Excel ribbon:
Before Excel 2007: Use the “XLS Padlock” menu.
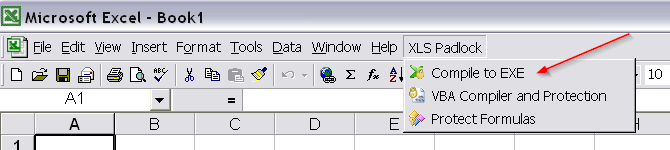
Excel 2007 and later: Click “Secure Compile to Exe” in the “XLS Padlock” ribbon tab.
![]()

Note
Always save your Excel workbook before opening the XLS Padlock interface to ensure all recent changes are included in the compilation.
3. Build Your Application #
After configuring your application’s settings, click the “Build Secure Application” button or press F5. XLS Padlock will compile your workbook and create the application EXE file.

Upon completion, a confirmation message will appear:
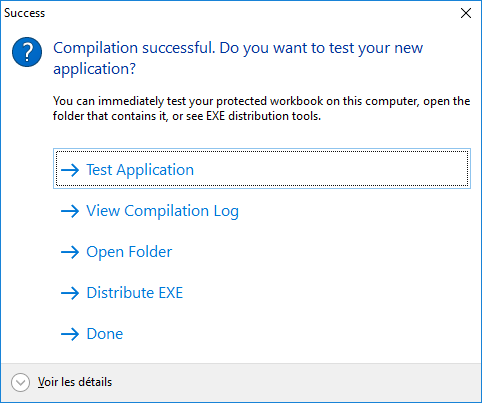
From this dialog, you can immediately run the application, view the compilation log (especially useful for troubleshooting errors), or open the destination folder.
Tip
XLS Padlock does not modify your original Excel workbook file during compilation. Always keep a backup of your original workbook.
Troubleshooting Formatting Issues
If your protected workbook displays strange results or formatting issues, try enabling the “Use Excel automation for formula protection” option on the “Formulas and Passwords” page.
👉 See Also: