How to Set Up Hardware-Locked Activation Keys
Hardware-locked activation keys are a powerful way to prevent casual sharing of your protected workbook by tying each license to a specific computer. This guide shows you how to set them up.
About Hardware-Locked Keys
Section titled “About Hardware-Locked Keys”A hardware-locked key will only work on the computer for which it was generated. It is based on a unique System ID derived from the user’s computer hardware, making the key useless if shared with others.
1. Enable Hardware-Locked Keys
Section titled “1. Enable Hardware-Locked Keys”In the XLS Padlock settings, check both “End users must enter an activation key…” and “Use hardware-locked keys”:
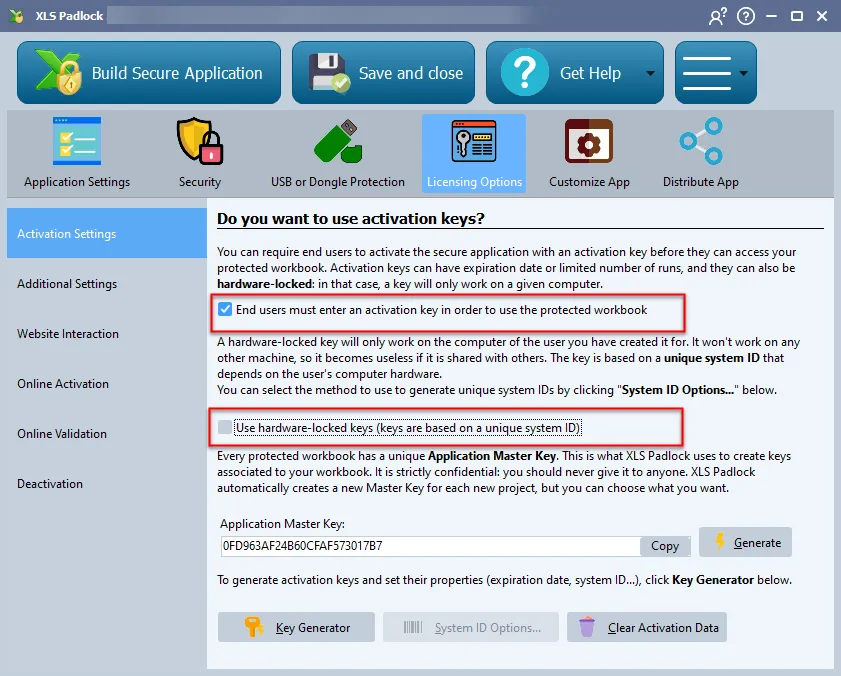
You can optionally configure which hardware components are used to generate the System ID by clicking “System ID Options…”. It is important not to change these options after you have started deploying your application.
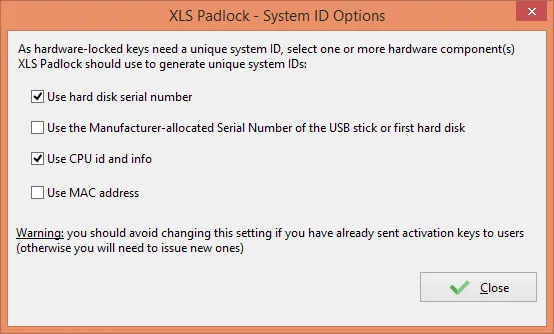
Use Enhanced Hardware Fingerprint
Section titled “Use Enhanced Hardware Fingerprint”Starting with XLS Padlock 2026.0, the System ID Options dialog also exposes an additional checkbox: “Use enhanced hardware fingerprint”.
When this option is enabled, the protected EXE uses a reinforced System ID computation:
- The Windows-lock source reads the unique Windows installation identifier directly from the system registry instead of the disk volume scan used by the legacy algorithm. This identifier is stable across volume reformats and physical disk swaps. Only a complete Windows reinstall regenerates it.
- All hardware sources are normalized (trimmed, case-canonicalized) and clearly delimited inside the fingerprint computation, eliminating a class of structural collisions where two distinct machines could occasionally land on the same System ID. The new logic also protects against false negatives when one source becomes temporarily unavailable (for example when an antivirus blocks WMI calls) by keeping the System ID stable instead of mutating it.
- The underlying hash is upgraded to SHA-256 in place of the older MD5, removing a deprecated algorithm from the protected EXE’s cryptographic footprint.
The displayed System ID format is unchanged, still 14 hexadecimal characters in the familiar XXXX-XXXX-XXXX form, so your end users and your key generation workflow do not see any difference.
Default behavior:
- Existing projects (saved with XLS Padlock 2025.3 or earlier): the option is OFF by default. This preserves every activation key already in circulation: the System IDs your customers obtained from older builds keep matching the keys you issued.
- New projects (created with XLS Padlock 2026.0 and later): the option is ON by default.
⚠️ Important: changing this option on a project that has already been deployed will rotate the System ID for every end user, invalidating all activation keys you have issued so far. Only enable it on a new project, or coordinate the change with a re-issue of every customer’s key.
2. How Users Get Their System ID
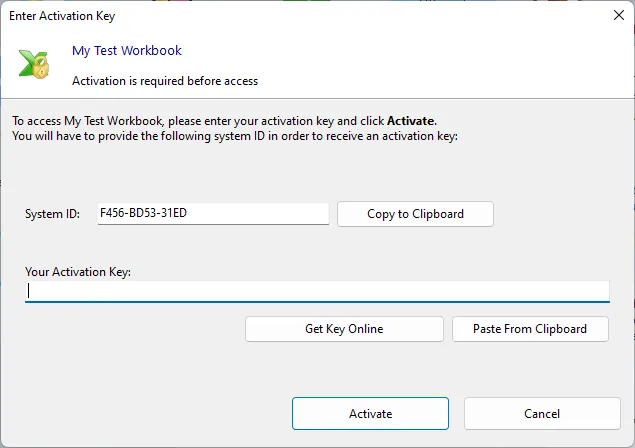
Section titled “2. How Users Get Their System ID”When a user runs your application for the first time, they will be prompted to enter an activation key. Their unique System ID will be displayed in this window. The user must copy this ID and send it to you.
3. Generate the Activation Key
Section titled “3. Generate the Activation Key”Open the Key Generator in XLS Padlock. Paste the customer’s System ID into the designated field and click Generate. You can then copy the key and send it to your customer.
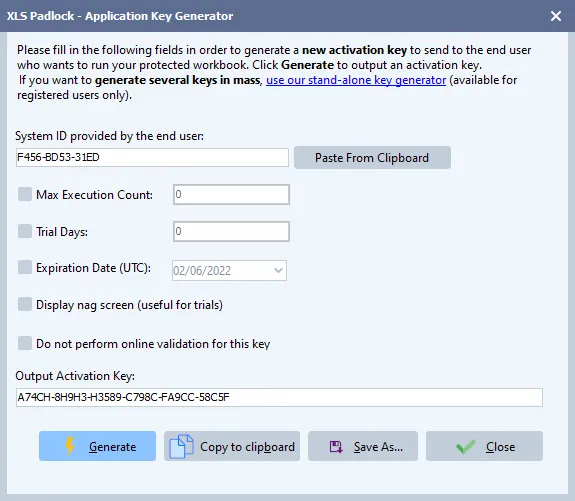
When the customer enters the key, the application will be activated and will not ask for the key again (unless it has an expiration date). Because the key is tied to their System ID, it will not work on any other computer.
👉 Want to automate the creation of hardware-locked activation keys? Read more about online activation.