Configuring the Excel workbook
- In your XLS Padlock project, navigate to the “Activation Keys / Online Activation” page.
In the Base Activation URL field, enter the base URL as defined previously (see Base URL for activation) on your web server followed by /getactivation/{product ID} (a final slash / is not mandatory) and replace {product ID} with the product ID associated to your workbook (and defined in workbooks.json).
In our case started earlier, it would be:
https://www.mywebsite.com/wordpress/activation/getactivation/68If the product ID is omitted, the first product defined in workbooks.json will be used.
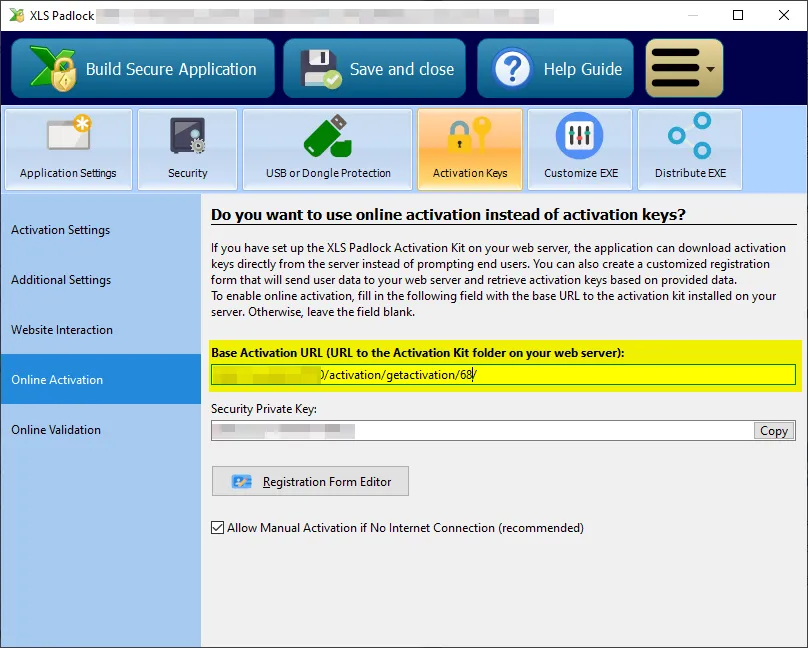
XLS Padlock can handle TLS/SSL connections: if your web server has a valid SSL certificate, you can use secure URLs that begin with HTTPS.
- Click Registration Form Editor. XLS Padlock shows a basic HTML editor and a preview of the dialog’s text. You can define your own HTML text but at least an HTML field named token is required.
For instance, we can use the following HTML code for the registration form editor:
<FONT size="10"><B>Activation Required</B></FONT><br><br>Welcome to this sample application made with Excel and XLS Padlock. <Ahref="https://demo.xlspadlock.com">Learn more about this application</A><br><br>To access this application, please enterthe activation code that you received after your order and press <B>Activate</B>. If your computer has no Internet connection,choose <B>Manual Activation</B>.<br><br>Your Activation Code:<br><CONTROL TYPE="EDIT" WIDTH="280" VALUE="" ID="token">Only this part is mandatory because it defines the HTML field that lets the user enter their activation token:
<CONTROL TYPE="EDIT" WIDTH="280" VALUE="" ID="token">Save your changes and close the editor.
- Compile your workbook EXE application. It is now associated to the web application.