You can offer a preview of your Excel workbooks to potential customers by creating a trial version that requires a license to unlock the full functionality. This is possible with XLS Padlock’s activation keys.
This guide shows you how to set up a trial period for your workbook application.
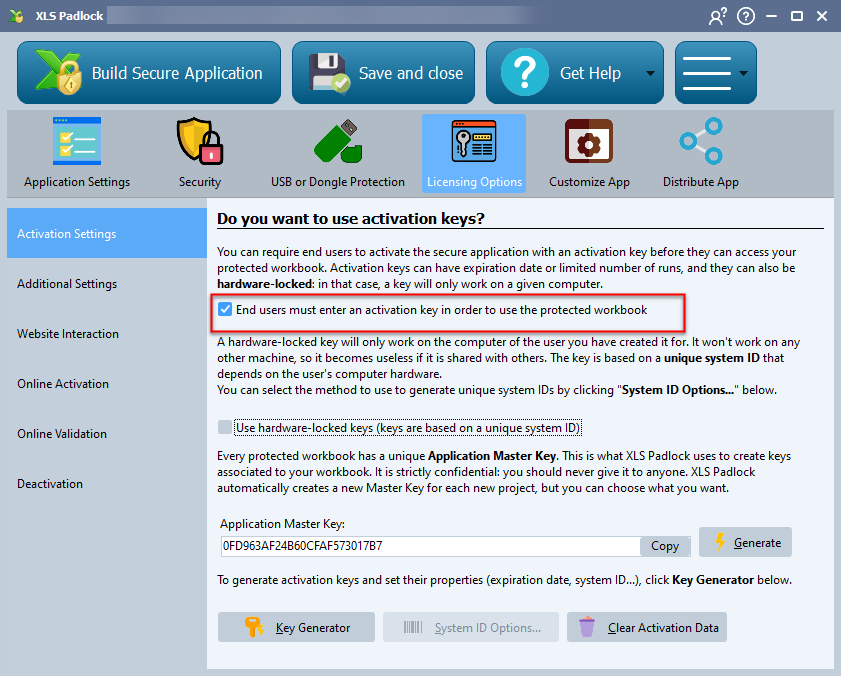
1. Enable Activation Keys #
First, enable the option “End users must enter an activation key in order to use the protected workbook” and rebuild your application.
2. Generate a Trial Activation Key #
Open the Key Generator in XLS Padlock.
To define a trial period, you can set a Trial days limit (e.g., 15 days), a fixed Expiration Date, or a Max Execution Count.
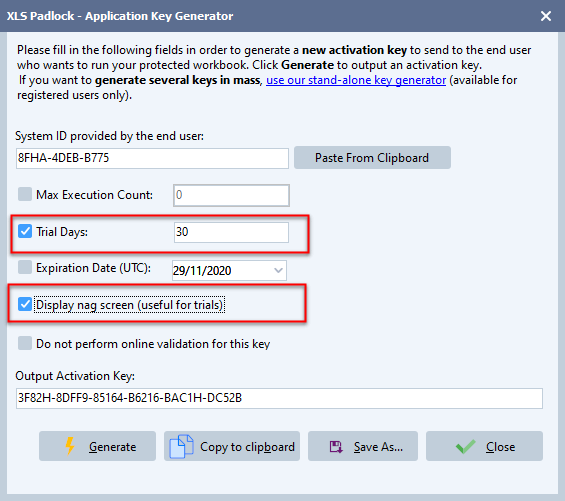
To remind customers that they are using a trial, check “Display nag screen”. This will show a reminder dialog each time the application starts.
Click Generate to create the trial key, which you can then distribute to your users.
How the Application Works in Trial Mode #
Your customers will enter the trial key to activate the application.
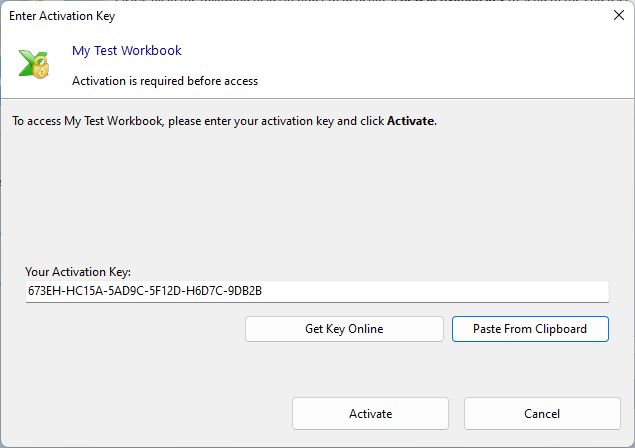
Once activated, the workbook will open, but the nag screen will appear to show the remaining trial duration.
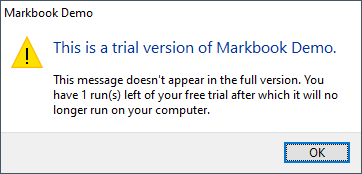
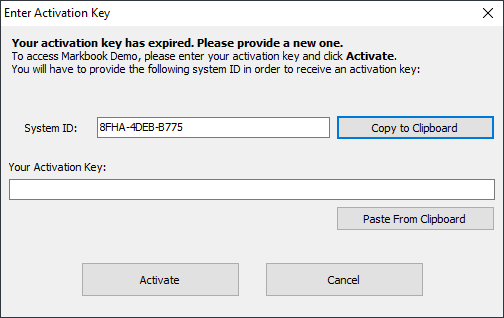
When the trial period is over, the application will require a new, non-trial activation key to continue working.
Checking the Trial State with VBA #
You can also programmatically check if the compiled workbook is in a trial state using the VBA API.